Pages


About Me

My photo
Farnham
http://www.lvincent.co.uk/ http://lvincent123.blogspot.com/

Friday, 3 February 2012

MAX Character Animation - Maya

I have decided to download a fully modelled and rigged character. This will allow me to just focus on the character animation itself without the need of modelling and rigging - something I have no idea how to do.

The downloaded project came complete with rigs and facial controls. I was amazed at how different panels surrounding the head could be manipulated
with ease creating facial expressions.

The eyes and eyelids could be manipulated as well as the mouth and eyebrows.

I animated this little character by moving his arm up and creating a tilt of the head with facial expression. A small control panel also allowed me to move the tongue!!!

This exercise allowed me to further explore the transform and rotate tools in direct contact with rigs and character animation.
The animation came out ok. I also added a camera zoom and pan. It almost looks as if he is saying 'STOP!" at the camera. It is by no means polished off but I especially like the double blink towards the end.
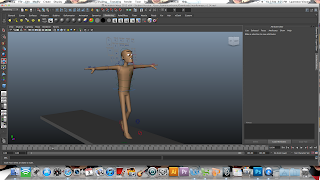
Next, I thought I would give a walk cycle a go. I had no clue how to do this so just as an experiment I started playing around with the keyframes and various rig positions. By applying my knowledge of walk cycles from Animation Principles I  had a go.

It all went a bit 'crazy'. I still need to animate the arms. The legs look ok but the whole movement is a little too exaggerated and jerky.


The looping did not quite work either. Next I'll try something a little more subtle...

I used this website to download the character

Thursday, 2 February 2012

Experimenting with Textures & Lighting - Maya

I have decided to start playing around with some textures and lighting. I wanted to see how realistic and beleivable I could make the scene. 
To do this I created both a cube and a sphere. I key framed the ball jumping up and down and animated the camera to pan around the stage. 


(Above) I added two directional lights. These are shown as two red lines pointing down upon the shapes.
The lights can only be visible once the frame has been fully rendered. The left hand frame shows the perspective from the camera pointing down at the ball. The camera is shown to the right pointing down at the 'point of interest'.


To add texture I had to create something known as a 'blinn'. I still don't fully understand what these are fully capable of doing but they appear to create a surface upon the shapes. I dowloaded an image file of some wood. By uploading the wood image onto the blinn the wood can be applied onto the surface of the cube. 


After rendering the frame the 'blinn' appears to have applied the wood onto the cube. The lighting effects and shadows can also be viewed. 

The wood, however feels a little flat. So I decided to investigate into how to roughen it up and make it look more like chunky wood....
To do this I had to create an alpha channel of the wood image. To do this I used photoshop forming a black and white image of the wood. By applying the Black and white image of the wood onto a 'bump map' the computer cleverly recognises that the black edges of the image are to be lowered creating depth. Using a sliding control the depth of the texture can be controlled.
The wood now looks a little more textured. Also as the camera pans around the lighting reflection changes.

Finished clip:


Wednesday, 1 February 2012

Experimenting with Maya...


Digital Skills Two will teach me the basics of 3D CGI animation.

This Friday we will be taught 3D using a piece of software named 'Softimage'. However as a Mac user I am unable to use 'Softimage' due to compatibility issues.

Therefore I have decided to play around with Maya a similar piece of software created by the same company, 'Autodesk'.

I have very limited knowledge of 3D CGI so it was a lot of fun learning and practicing with this fantastic piece of software.

By watching several Youtube tutorials etc I have slowly built up an understanding of some of the very basic tools.

Firstly I decided to experiment  with 3D shapes named 'NURBS Primitives'. These shapes can be key framed using the timeline. I have learnt how to move, rotate and scale the object as well as adding basic textures.

I also decided to start playing around with a few virtual cameras. These cameras can be key framed to follow various points of interest etc. Depth of field etc can be added also....

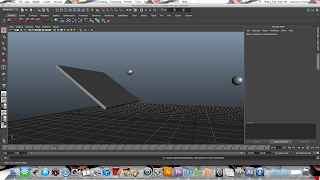
Below, is one of my first CGI animations. It took about two hours to create. I created two spheres and animated them flying into a wall. As they impact the wall the wall flips around and shakes.


Above, by creating a virtual camera I can create camera movement etc.
I am quite pleased how the animation turned out (Very Quick!!) By using the squash and stretch technique a real force and cartoony feel is added. 
I was a little confused into how to render the final shot. After adding some ambient light I clicked on batch render which saved the clip as an image sequence. I then composited the image sequence onto After Effects where the clips formed moving footage.


Sunday, 8 January 2012

Final Film!

I have finished the Digital Skills 01 film. The final running time is exactly 40 seconds which runs through realatively nicely.


Although the film is complete, there is still much more polishing and finishing up needed for the portfolio etc.

I believe the film has been reasonably successful. This is the first time I have ever used After Effects, I have pushed the boundaries and experimented with different techniques and presets. This project has enabled me to think outside the box both technically and creatively. It has enabled me to research and learn both the basics and advanced techniques within After Effects.
 The whole process has been a really enjoyable experience as I have enjoyed thinking creatively about the production and usage of After Effects, Premiere Pro and Encore. The use of lighting, 3D space and camera positioning was paramount for the success of this film. Without reading and learning about all the hidden tools within After Effects this would not have been possible. For example, if this film had no 3D space or depth of field the results would have been much less realistic and unprofessional. Likewise without specific lighting and colour correction the whole movie would have no atmosphere or realism.

I think the first half of the film has to be the most successful. I am really pleased how Croydon has come to life. The lorry and the bus work really well as they really portray the speed and rush of an urbanised area.

The rotsoscoped smoke has really shown the polluted state of any modern day town/city. This exaggerated smoke really helps tell the story, as it can be these little things that make all the difference.

The forest works relatively well, with its bright vivid colours, though, looking back some of the 3D layers have not worked as well and fluently as Croydon. The autumnal stage also is much too quick.

Overall, I am pleased with my efforts, though by no means perfect  I am just glad its finished!
The DVD's have been burnt, all set for Wednesday deadline!!!!!

Back to finishing Animation Principles now!