Pages


About Me

My photo
Farnham
http://www.lvincent.co.uk/ http://lvincent123.blogspot.com/

Friday, 3 February 2012

MAX Character Animation - Maya

I have decided to download a fully modelled and rigged character. This will allow me to just focus on the character animation itself without the need of modelling and rigging - something I have no idea how to do.

The downloaded project came complete with rigs and facial controls. I was amazed at how different panels surrounding the head could be manipulated
with ease creating facial expressions.

The eyes and eyelids could be manipulated as well as the mouth and eyebrows.

I animated this little character by moving his arm up and creating a tilt of the head with facial expression. A small control panel also allowed me to move the tongue!!!

This exercise allowed me to further explore the transform and rotate tools in direct contact with rigs and character animation.
The animation came out ok. I also added a camera zoom and pan. It almost looks as if he is saying 'STOP!" at the camera. It is by no means polished off but I especially like the double blink towards the end.

Next, I thought I would give a walk cycle a go. I had no clue how to do this so just as an experiment I started playing around with the keyframes and various rig positions. By applying my knowledge of walk cycles from Animation Principles I  had a go.

It all went a bit 'crazy'. I still need to animate the arms. The legs look ok but the whole movement is a little too exaggerated and jerky.


The looping did not quite work either. Next I'll try something a little more subtle...

I used this website to download the character

Thursday, 2 February 2012

Experimenting with Textures & Lighting - Maya

I have decided to start playing around with some textures and lighting. I wanted to see how realistic and beleivable I could make the scene. 
To do this I created both a cube and a sphere. I key framed the ball jumping up and down and animated the camera to pan around the stage. 


(Above) I added two directional lights. These are shown as two red lines pointing down upon the shapes.
The lights can only be visible once the frame has been fully rendered. The left hand frame shows the perspective from the camera pointing down at the ball. The camera is shown to the right pointing down at the 'point of interest'.


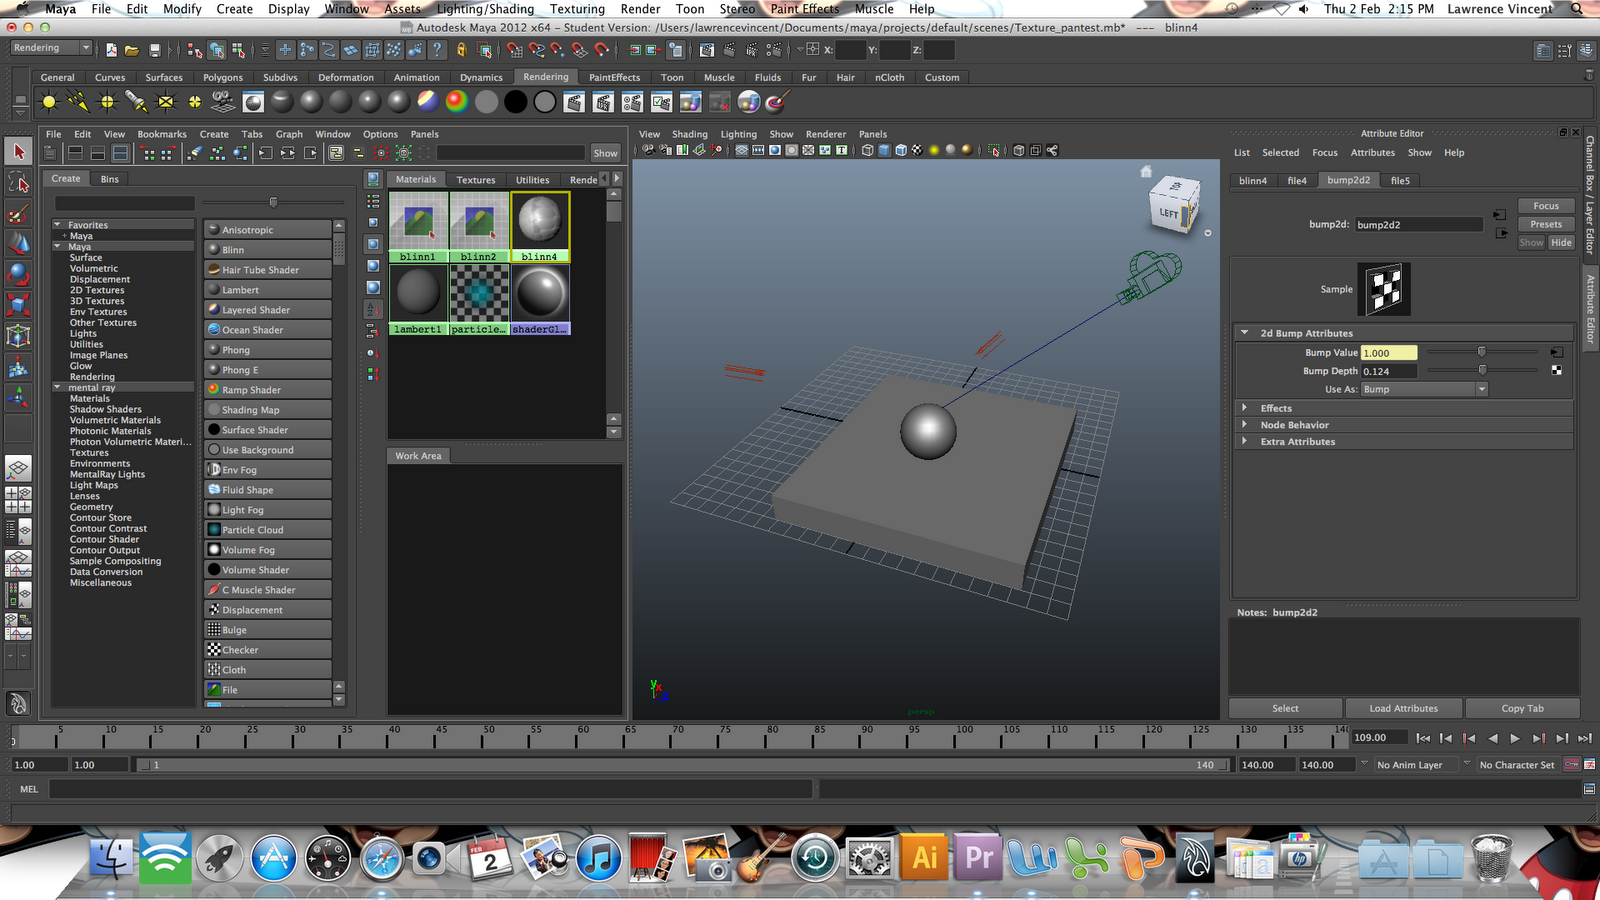
To add texture I had to create something known as a 'blinn'. I still don't fully understand what these are fully capable of doing but they appear to create a surface upon the shapes. I dowloaded an image file of some wood. By uploading the wood image onto the blinn the wood can be applied onto the surface of the cube. 


After rendering the frame the 'blinn' appears to have applied the wood onto the cube. The lighting effects and shadows can also be viewed. 

The wood, however feels a little flat. So I decided to investigate into how to roughen it up and make it look more like chunky wood....
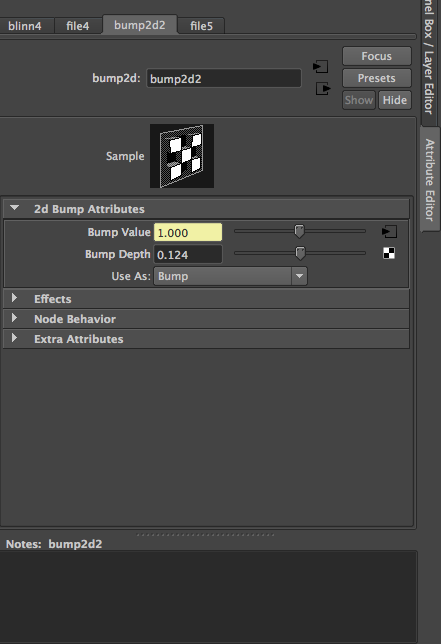
To do this I had to create an alpha channel of the wood image. To do this I used photoshop forming a black and white image of the wood. By applying the Black and white image of the wood onto a 'bump map' the computer cleverly recognises that the black edges of the image are to be lowered creating depth. Using a sliding control the depth of the texture can be controlled.
The wood now looks a little more textured. Also as the camera pans around the lighting reflection changes.

Finished clip:


Wednesday, 1 February 2012

Experimenting with Maya...


Digital Skills Two will teach me the basics of 3D CGI animation.

This Friday we will be taught 3D using a piece of software named 'Softimage'. However as a Mac user I am unable to use 'Softimage' due to compatibility issues.

Therefore I have decided to play around with Maya a similar piece of software created by the same company, 'Autodesk'.

I have very limited knowledge of 3D CGI so it was a lot of fun learning and practicing with this fantastic piece of software.

By watching several Youtube tutorials etc I have slowly built up an understanding of some of the very basic tools.

Firstly I decided to experiment  with 3D shapes named 'NURBS Primitives'. These shapes can be key framed using the timeline. I have learnt how to move, rotate and scale the object as well as adding basic textures.

I also decided to start playing around with a few virtual cameras. These cameras can be key framed to follow various points of interest etc. Depth of field etc can be added also....

Below, is one of my first CGI animations. It took about two hours to create. I created two spheres and animated them flying into a wall. As they impact the wall the wall flips around and shakes.


Above, by creating a virtual camera I can create camera movement etc.
I am quite pleased how the animation turned out (Very Quick!!) By using the squash and stretch technique a real force and cartoony feel is added. 
I was a little confused into how to render the final shot. After adding some ambient light I clicked on batch render which saved the clip as an image sequence. I then composited the image sequence onto After Effects where the clips formed moving footage.


Sunday, 8 January 2012

Final Film!

I have finished the Digital Skills 01 film. The final running time is exactly 40 seconds which runs through realatively nicely.


Although the film is complete, there is still much more polishing and finishing up needed for the portfolio etc.

I believe the film has been reasonably successful. This is the first time I have ever used After Effects, I have pushed the boundaries and experimented with different techniques and presets. This project has enabled me to think outside the box both technically and creatively. It has enabled me to research and learn both the basics and advanced techniques within After Effects.
 The whole process has been a really enjoyable experience as I have enjoyed thinking creatively about the production and usage of After Effects, Premiere Pro and Encore. The use of lighting, 3D space and camera positioning was paramount for the success of this film. Without reading and learning about all the hidden tools within After Effects this would not have been possible. For example, if this film had no 3D space or depth of field the results would have been much less realistic and unprofessional. Likewise without specific lighting and colour correction the whole movie would have no atmosphere or realism.

I think the first half of the film has to be the most successful. I am really pleased how Croydon has come to life. The lorry and the bus work really well as they really portray the speed and rush of an urbanised area.

The rotsoscoped smoke has really shown the polluted state of any modern day town/city. This exaggerated smoke really helps tell the story, as it can be these little things that make all the difference.

The forest works relatively well, with its bright vivid colours, though, looking back some of the 3D layers have not worked as well and fluently as Croydon. The autumnal stage also is much too quick.

Overall, I am pleased with my efforts, though by no means perfect  I am just glad its finished!
The DVD's have been burnt, all set for Wednesday deadline!!!!!

Back to finishing Animation Principles now!

Tuesday, 27 December 2011

Finalising the Film

The film is nearing its completeion as all the scenes have been animated and polishing has begun..

Below, I have taken several screenshots from the film to show my progress. I have started considering the sound design, all the foley etc needs to be carefully considered, especially for the forest. I will use various soundtracks from 'Fantastic Mr. Fox'.

The film so far:


Here Zoe walks across a street of Croydon. The buildings have been created out of my own images I photographed in and around Farnham.

The smoke here has been rotoscoped from a Youtube video.


The camera cuts to a tracking shot of Zoe's upper body as she continues to walk. A billboard is present which reveals a favourite phrase from Zoe.

A lorry drives past revealing a huge fox printed onto the side. This reveals the love of foxes Zoe has. The lorry leaves behind a huge dust cloud which I rotoscoped from various smokey videos.

The bus then drives past advertising 'The Lion King' This bus acts as a wipe transition as....

..... a close up of Zoe is revealed. Foliage begins to become present and a sign pointing  to 'Croydon forest' is revealed.  Zoe walks towards the foliage, greenery and branches.

As she enters a flash of light is created as the contrasting transition is formed. Using various 3D layers branches and leaves are able to brush past the camera with ease.
 She exits the bush revealing  a whole new magical, green forest. Light rays burst down onto Zoe as she walks along merrily.
 The whole scene fades to orange as autumn arrives. Animated autumnal leaves fall. Zoe throws leaves above her head.
Scene cuts to wider shot of Zoe. Light fades fast to night. Here she stope walking for the first time. She looks up towards the tree canopy....


... The camera pans up, branches rustle as the camera glides through the canopy revealing a starry moon lit night sky.

The word Zoe is then formed around the moon.


Fin


The film is now pretty much complete. The backgrounds have worked really well as well as the 3D layers, though the character animation and walk cycle may need some refining and polishing. A few tweaks with the lighting and shading are need too.

Nearly time to do the all important final render.

With the DVD case complete I must now create a DVD menu which i will create using photoshop.

Monday, 26 December 2011

Update _ Forest

The overall film seems to be coming along nicely and should be finished within the next few days! The forest scenes have taken several days to complete due to all the different 3D layers and lighting effects.

One version of the forest scene took over 45 mins to render and is composited of over 100 layers... 

(Below) Compositing the forest. Each tree has to be treated within a 3D atmosphere as the several z axis are manipulated back and forth to create depth. Motion blur etc has to be added to create the illusion of depth spacing and movement. 

I find myself getting rather lost within this jumble of layers and arrows, though, I think I'm slowly getting into a routine and suitable workflow. 


The lighting for the forest scene is paramount for its success. The idea of the film is to contrast the dark and grubby streets of Croydon with the bright and striking colours of the natural forest.


One imporatnt scene in the film is when autumnal leaves begin to fall from the tree canopy as the whole scene fades to orange.

After much head scratching I cut out several autumnal leafs using photoshop.

Once composed onto a new composition I could play around with the 3D space and motion paths.


The organic floating nature of a leaf was hard to acheive though with the help of the rotation and scale tool  I was able to achieve this piece of animation - by no means perfect but should work well upon my forest composition.

The animated autumnal leaves were then composited onto the forest scene and tweaked to fit in.


The scene is coming along nicely - still lots of adjustments to do, though.

Tuesday, 20 December 2011

Camera Track 01

I have managed to create the illusion of a camera tracking from right to left along a busy/polluted Croydon street. Th camera runs parallel to Zoe as she walks down the street!

To create this illusion I have attached the background onto a motion path running from left the right. This created a so called 'conveyor belt' effect as everything on screen moved to the left along a straight parallel path.

By keeping the Zoe puppet stationary the illusion of a camera tracking alongside her was achieved!


This scene took a long time as all the layers had to be composited into a 3D atmosphere.

This enabled the illusion of depth to be created.

During this scene Zoe walks past a billboard advertisement saying 'Zoe says yeah yeah!'
This is Zoe's favourite phrase - assessment criteria.

Rotosocoped smoke added atmosphere, though the final bus and lorry designs still need adding!


^^ A lorry approaches in After Effects!

Friday, 16 December 2011

Vehicles _ Croydon


I have now completed the two vehicles which will drive by during the Croydon scenes. 
Both the bus and the lorry incorporate the various themes of 'Zoe'. 
On the side of the bus 'The Lion King' is advertised and on side of the lorry a fox is present. 

Although subtle these images I created on photoshop will portray the world of Zoe!


If you look really closely you will be able to see 'Zoe' printed onto the lorry cab and the front of the bus.
The number 13 is present on the bus as this is Zoe's favourite number?!

I'm really pleased with the outcome of the designs, all the images were taken off Google. These will only be on screen for a split second (bus acts as a wipe transition)

The bus and lorry will drive by after the first cut. After the establishing shot a close up of Zoe walking along the street will follow.

The shot will be shown as the camera tracks along a street of Croydon with Zoe.

As the camera pans and tracks parallel to Zoe various buses and lorries will travel by advertising Foxes etc.

I have started to build the camera tracking scene from various photographs I took of Farnham:


Tuesday, 13 December 2011

1st Attempt - Forest

I have decided to experiment with the proposed forest scene. After Zoe has walked down a busy street of Croydon she walks into a 'mystical' shrub which acts as contrasting transitional point. As the bush passes a whole new peaceful world arrives on screen.

Shrubs and tree trunks replace the urban concrete jungle and as Zoe enters deeper into the forest the whole scene becomes more mystical as autumn arrives and then night.

This scene is going to take a lot of time and rendering power. This is because all the individual tree trunks and plant life must be cut out and seperated onto layers. Therefore the illusion of depth and 3D can be produced.

The forest test below:
(Sorry for bad quality)

I am relatively pleased. The 3D layers have worked pretty well. However, perhaps more shrubbery needs to be present in the foreground. Also the depth of field could possibly exaggerated a bit more. The background could do with being a bit more blurred.

The Zoe puppet will of course be animated!

To create the dust particles I composited the animation preset: 'cc snow'. I then set the speed of the snow to
-0.03. This negative value caused the snow to slowly rise upwards.

Next I want to try and create some light rays and 'funky' lighting effects - it all possibly needs to be a bit brighter and vivid.

Below: The 'magical' bush which acts as a transitional wipe between Croydon and the forest is coming along nicely.

Monday, 12 December 2011

Case Design

I have now printed a DVD case for my digital skills film. The design incorporates all the main themes of my short film.
These themes include Croydon, night, forest, autumn etc...

The design took a few days to create on Photoshop. (Over 30 layers were used to make up this design). The Zoe 'logo'/typography has been used which I really feel gives my film a unique 'trademark'.


Sunday, 11 December 2011

Scene02

Been very busy with the essay the past few days but I've started work on the next scene for the Digital film. After the Croydon opening scene the camera will track along a street of Croydon as Zoe continues to walk.

To do this I have created a panorama composition of a street in Croydon. This way when composited onto After Effects I can key frame the background to move to the right. The Zoe puppet will stay stationary (head bounce etc) but the movement of the background will give the illusion of her walking.

The scene seems to be coming along nicely so far. Next I've got to composite on to After Effects!

Friday, 9 December 2011

DVD Labelling

With Christmas fast approaching I have decided to print my DVD labels before heading back north.

I designed the label on photoshop and got some printed off at 'DiskKing' earlier today.

I though it would take them quite a few days to process but they printed it off within 5 minutes!! Very impressed with the service.

I decided to print another spare copy off, just in case I mess up when rendering over the holidays!!

^ A fresh batch of shiny Zoe DVD's! :)

I also started experimenting the the DVD case.

Still needs a lot of work, but this shows how it may possibly appear:

Have to make the film now......

Wednesday, 7 December 2011

DVD

One of the assessment requirements is for the DVD to have a printed label.

Using the DVD template off 'MyUCA" I used Photoshop to create my design.

It consists of the Zoe typography in front of a night sky gradient.

I thought I would get this out of the way before Christmas, so I'm off to 'DisKing' tomorrow to get it printed.

(Below) Almost complete, my name needs adding!

Friday, 2 December 2011

Scene 01 - Initial Walk Cycle

I have now added the Zoe walk cycle puppet onto my earlier composition of Croydon. The scene seems to be working well as Zoe walks from right to left.

I'm not amazingly pleased with the walk cycle, I found it really tough manipulating the individual layers whilst parenting/rotating etc.. However, I feel the whole overall effect of this scene is looking good - not perfect but a good start. I feel the puppet needs more of a head bounce.

Thankfully this is the only walk cycle I have to animate for this film, the rest is framed from the waist up. Due to time ticking by and Christmas fast approaching, I will get on with the next scenes. I'm sure these will test and challenge my knowledge of After Effect too - so I'm looking forward to it!

The first scene below:

I created a mask and dropped the opacity. This mask acted as a subtle shadow beneath Zoe as I parented it to the puppets motion path.

Thursday, 1 December 2011

A little more compositing...

I'v been busy working further on the first scene of my digital skills film.

The compositing seems to be coming along nicely. All thats left for this scene is to animate the puppet(walk cycle).

I have added some ambient sound effects as well some of the Fantastic Mr.Fox soundtrack - which Zoe likes. This enables me to really see and hear how these Croydon scenes will turn out.

The rotoscoped smoke works well, as does the little train.

The puppet is out of focus and inanimate at the moment, these will be worked on tomorrow creating the first scene!

I am pretty pleased with the results so far.

Sunday, 27 November 2011

Testing out the first scene (Farnham - Croydon)

The 'establishing' first scene involves a wide shot of a dusty and dirty street of Croydon. Zoe walks from right to left down this street as heavy pollutants billow out of chimneys in the background.

The whole scene must be believable showing how urban Croydon is.

When I come to design and animate the bright and colourful forest scenes later, this will make a fantastic contrast with theses polluted scenes.

The chimney smoke acts as moving footage, I am carefully making sure I meet the assessment requirements

I even added in a little train running past at the beginning - little subtle things like this really bring the busy streets of Croydon to life - though, I have to be careful I don't distract the audiences attention too much!

Zoe walks across the screen. I have not animated my puppet yet as her legs/arms etc still need adding, though I think I've worked out the timing and the composition.


^This scene includes a lot of my own photography, I did not want to pinch loads of images off Google.
This is because I can observe the buildings themselves in real life and shoot certain specific camera angles.
(note: the scene will cut directly after she exits scene)

However, I am living in 'leafy' Farnham, a town not known for its big industrial concrete masses.
By planning my efforts on 'Google Street View', I set out to find the shots I needed to make my composition.
I found a few back alleys around the back of Iceland in Farnham. By shooting various different camera angles etc I pretty much had a good library of 'Croydon' street photographs.
The little concrete strip at the top is
 the wall of a multi-storey car park, in the clip above this
is  a railway bridge


The composition looks good, though now I need to add in a sense of depth. Therefore, I need to chop some parts up furthermore and create a virtual camera. Some buildings need cleaning up and the shop signs look a little 'stuck on' so I need to blend those in bit more.


Saturday, 26 November 2011

Smoke!

I started compositing more layers of my rotoscoped smoke and created this rather smokey looking scene. This is far too smokey for my film, though it gave me an insight into smoke creation if I ever need to animate a fire?!

Friday, 25 November 2011

Rotoscoping - Smoke

One of the assessment requirements is to have at least one background containing moving footage.

I have decided to use the smoke coming out of the factory chimneys as my moving footage.

Due to living in 'leafy' farnham I am unable to easily film smoking stack chimneys myself. Therefore, I resulted in looking up stock videos of chimney smoke.
I found a great little video on YouTube of a smoking chimney. The quality wasn't bad either.


After successfully downloading the video I set out to use the rotoscoping tool on After Effects!

The idea was to cut the smoke away from the rest of the footage. This way I could then overlay the moving smoke onto my desired composition. 

 I have imported the footage straight onto After Effects, as I scrub the play head the footage plays. Time to do some rotoscoping.


I've clicked on the 'Rotobrush' tool, this enables me to draw a green line across the area I want to rotoscope. 
The green line does not have to outline the smoke, instead, it just has to act as a basic guide for the rotoscoping reference. 


Once the green line has been drawn a pink outline has been automatically placed around the smoke. The computer has cleverly worked out, with the help of my green outline, that the contrasting smoke wants to be rotoscoped and separated from the sky behind!


As the playhead is scrubbed, the pink outline follows the smoke footage and sure enough it appears to have worked! After a bit of tweaking using the the 'rotobrush' tool a smooth reference is achieved. Now the moving smoke has been isolated from the rest of the footage.


 The checkerboard display shows the transparency behind the smoke. After a bit of tweaking, feathering and motion blur, the smoke moves seamlessly upon its own layer.  
This can now be placed onto a separate composition. Using layers I can now compose this upon my Croydon street scenes. 

I placed the moving smoke onto a new composition and quickly cut out some steam towers
 Here is the final test footage:


This took under 2 hours and I am really pleased with the outcome, this is definitely going to be used in my final film. The smoke could still do with a bit of tweaking though.

Many thanks to Alex for helping me out with this, a good After Effects session this afternoon! 

Time to make a film..!!!

After Effect Puppet Testing

A few weeks ago we learned how to animate a 'puppet' design on After Effects.

We were provided with pre-made designs as a hierarchy of layers consisting of separate layers such as upper arm, lower arm etc.

The individuality of each layer meant that each limb could be manipulated by a means of rotation and transformation.

By parenting each layer together with 'children' several body parts could not only be manipulated separately but also together in a well structured organic motion.


We then used the puppet tool, which I had previously used (see below) as an experiment on my 'Zoe' puppet. This gave me a very floppy 'un-organic' motion which looked a bit odd!

However, this puppet tool will definitely be useful!


From this, I can see that for my animation which involves a walk cycle using layer is much more appropriate!